Time to build the Astroshed
Time to build the Astroshed
I don’t know when exactly I knew I needed my
Astroshed. Maybe it was borne out of necessity; realising I had more kit than
I knew where to put; my old shed being on my to-do list to demolish or I just
got fed up of carting everything into the back garden to set-up and breakdown
every time there was a solid chance of a clear night. I think it was the fact
that, even when I got set up, I couldn’t move easily around the garden without
setting of my neighbours security lights. I can remember a particularly
frustrating session where this happened, only to be quickly followed with more frustration
when the clouds rolled in. There had to be a better way to do this……
Trawling the internet one evening I came across a blog
written by an amateur astronomer who had written about the same issues but had
done something about it. Further research revealed a plethora of Youtube videos
and stories of people converting mundane outbuildings, pre-fab sheds or even
building custom sheds from scratch to house their telescopes and so provide a
rudimentary observatory. This sparked my interest. I’d long considered the old
outbuilding I had in the back garden was an eyesore, full of old bikes, toys,
paint tins and junk left in there. The kids had grown up and left home so there
was really no reason why it had to stay this way. More to the point, the outbuilding
demolition was on my to do list and rapidly rising to the top of the list when
I considered the following. The outbuilding sat on good concrete base, had
mains power running from the house and was at the far end of
the garden and well out of the way of the passive IR sensors powering my
neighbours security lights. It also had the best overall view of the night sky
from my property; from the Eastern horizon right round to the North West
(accepting the roof line of neighbouring properties)with only one tall conifer
blocking the view from North to North East. With a bit of measuring and convincing
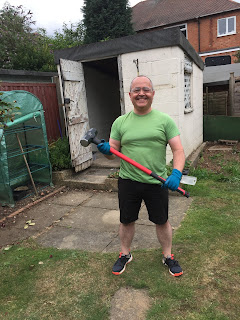
Mrs P this was a good idea I was ready to deploy the sledgehammer and clear out
the shed and some of it’s residents!! As you can see, I wasn’t going in
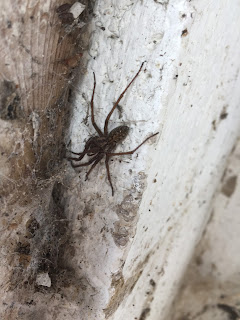
unarmed!By the way, no spiders were harmed in the demolition of this
shed, they just moved into next doors shed :-)!
 |
| It's clobberin' time! |
I’m going to add this link and thanks in recognition of
the inspiration from Mark Baines and his Linnhe Observatory to show what can be
achieved with a relatively modest outlay, some hard work and determination.
Everything I’m going to show you is based on his website Thanks Mark.
I’m not going to repeat Mark’s blog here – his instructions
are far better than I could provide, but I will point out some key differences.
Mark’s setup was built from the ground up and incorporated the footings etc for
a substantial pier mount for his impressive Meade telescope. My build is based
on existing foundations, which meant I had to adapt how I secured the
supporting timber frame for the Yardmaster shed kit to the old concrete base.
Beyond that, the build is pretty much the same. I am planning on a pier mount
but for now, my HEQ5 tripod with a pier extension is working fine for me.
Basic sequence of construction and pictures (below):
1.Build the
roof and supporting wood frame that will allow the roof to carry wheels to run
on a wooden frame track
2. Build the body of the shed as per the kit (mine is an 8ftx7ft Yardmaster metal shed)
3. Because the roof is separated from the body, you need a wooden support frame to keep the walls rigid but also provide a platform for the roof rails – so build a frame!
4. Sink your supporting posts for the roof rails
5. Get some help to raise the roof onto the shed and secure the roof in place with some heavy duty hooks and eyes
6. Finish the build with weather boards to cover the gap between the roof and the body of the shed
7. Stand back and admire……..


Comments
Post a Comment